Welcome to improving your health with your new Nordic Walking Poles. This is a quick tutorial on how to set up your new NORDIXX brand poles.
If you would like further information on how to set up your poles and instruction on the basic Nordic Pole Walking technique, sign up at InsideOut for a class with a Certified Instructor. For class information, click here.
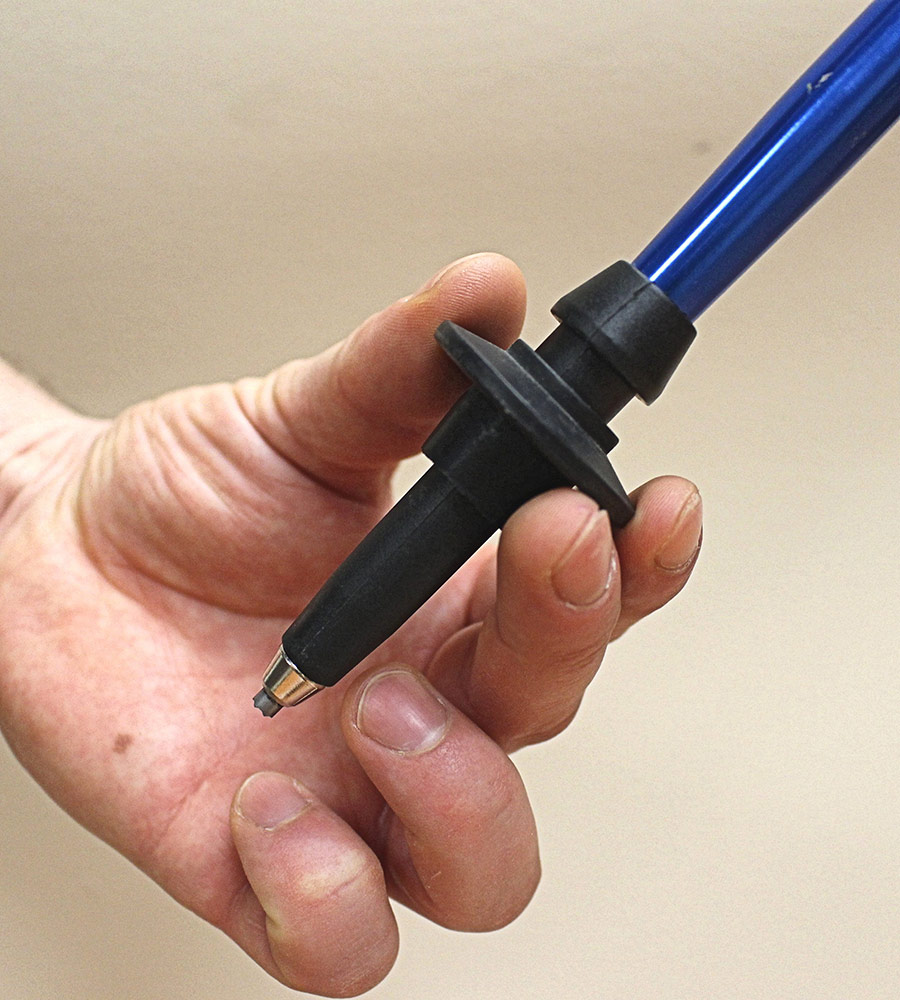
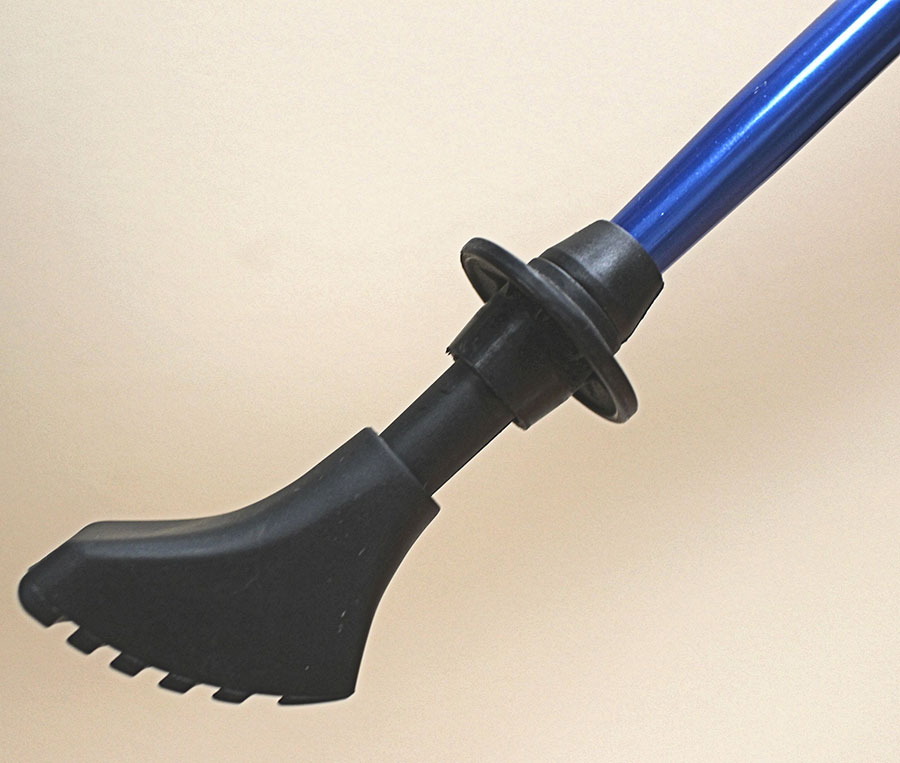
STEP 1 – Putting on Dirt Guard Cap
- There is a Dirt Guard Cap connected to each Wrist Strap. Remove the cap from Wrist Strap by cutting cable ties.
- Remove bottom Rubber Boot Tips on each pole by simply pulling it off.
- Screw on the cap at bottom of the pole so that the scoop is pointing down
- Push the Rubber Boot Tips back onto the bottom of each poles
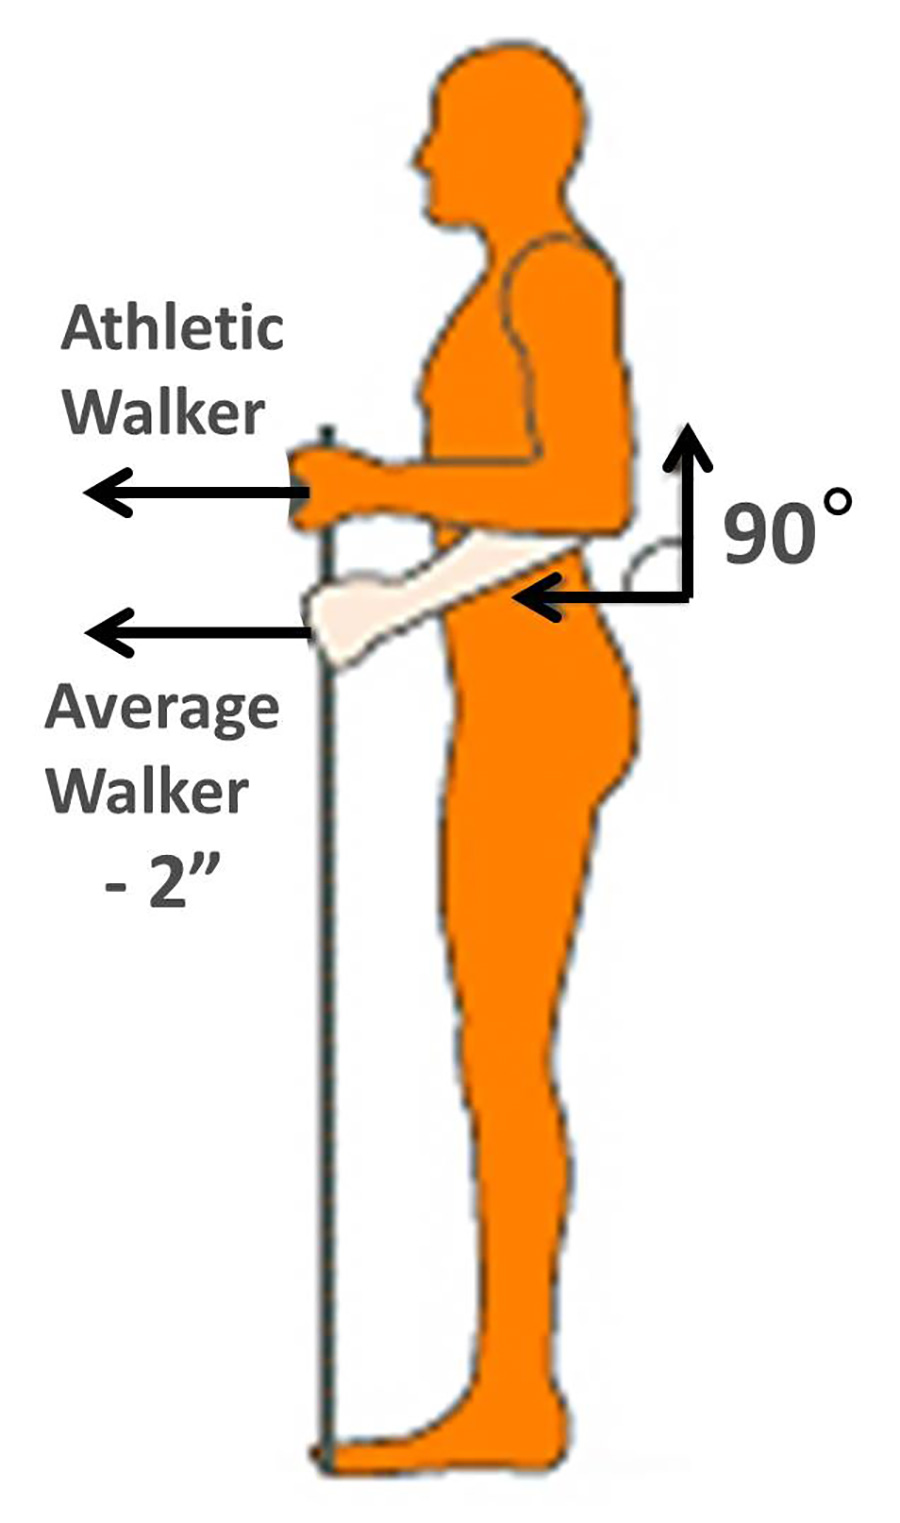
STEP 2 (A) – Extending pole to adjust to your height for Nordixx TRAVELER and WALKER poles
-
Put on shoes that you would normally walk in. This will give you your average height to then size the poles.
-
The poles come in either 2 sections (Nordixx Global WALKER poles) or 3 sections (Nordixx Global TRAVELER poles).
-
Hold the poles in front of you with the handle on your RIGHT side. Twist the pole approximately 7-8 times AWAY from you to loosen the locking mechanism. DO NOT keep turning and over-loosen the pole, 7-8 turns is enough. DO NOT turn the black collar between the sections of poles, turn only the poles themselves.
-
While the pole is loose, stand upright and hold the hand grip so that your hand is holding the black rubber/foam part of the hand grip. Hold your arm in a 90 degree position beside your body. Then take your arm down 2 inches from the 90 degree position. This is the now the correct height for you.
-
Hold the poles in front of you with the handle on your RIGHT side. Twist the pole towards you (TT = tighten towards you) 7-8 times to tighten the locking mechanism. Make sure you firmly tighten the poles. If the poles are even slightly loose, they will start to shorten as you walk.
-
If you have the Nordixx Global TRAVELER, make sure each of the 2 extension pole sections are adjusted to approximately the same length. This will ensure the poles are most stable.
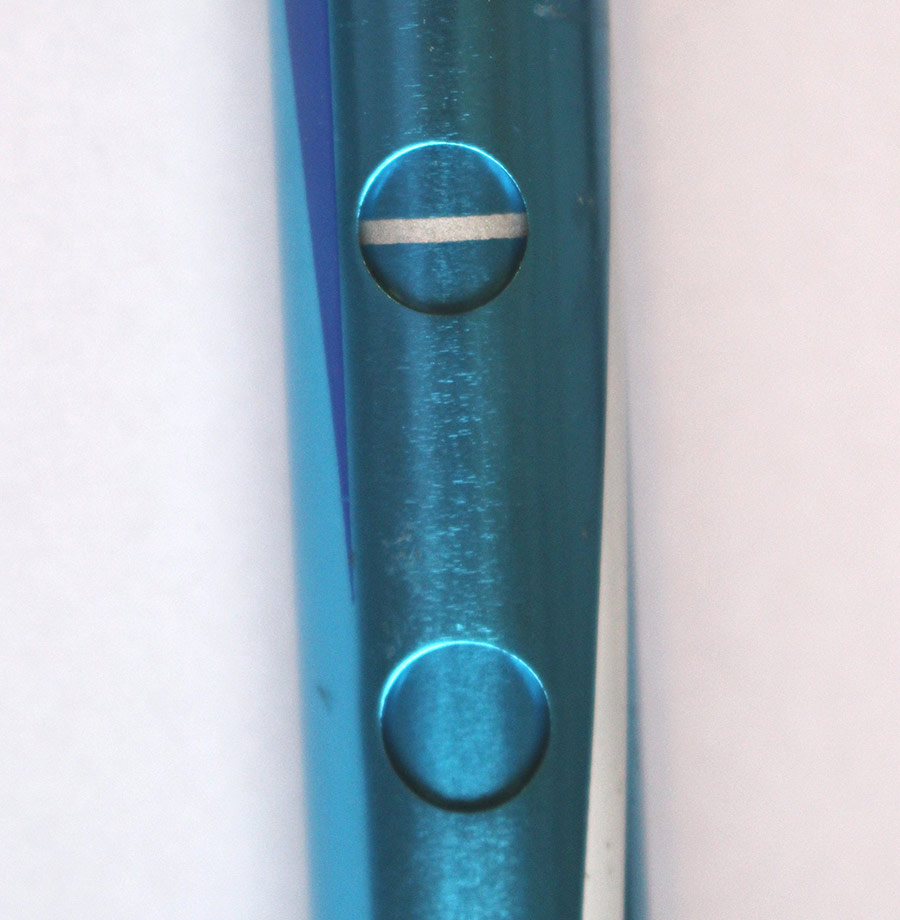
STEP 2 (B) – Extending the pole to adjust to your height for Nordixx STABILIZER poles
-
Put on shoes that you would normally walk in. This will give you your average height to then size the poles.
-
The poles come in 2 sections.
-
While the pole is loose, stand upright and hold pole in your hand so that your hand is holding the black rubber part of the Wrist Strap. Hold your arm in a 90 degree position beside your body. Then take your arm down 2 inches from the 90 degree position. This is now the correct height for you.
-
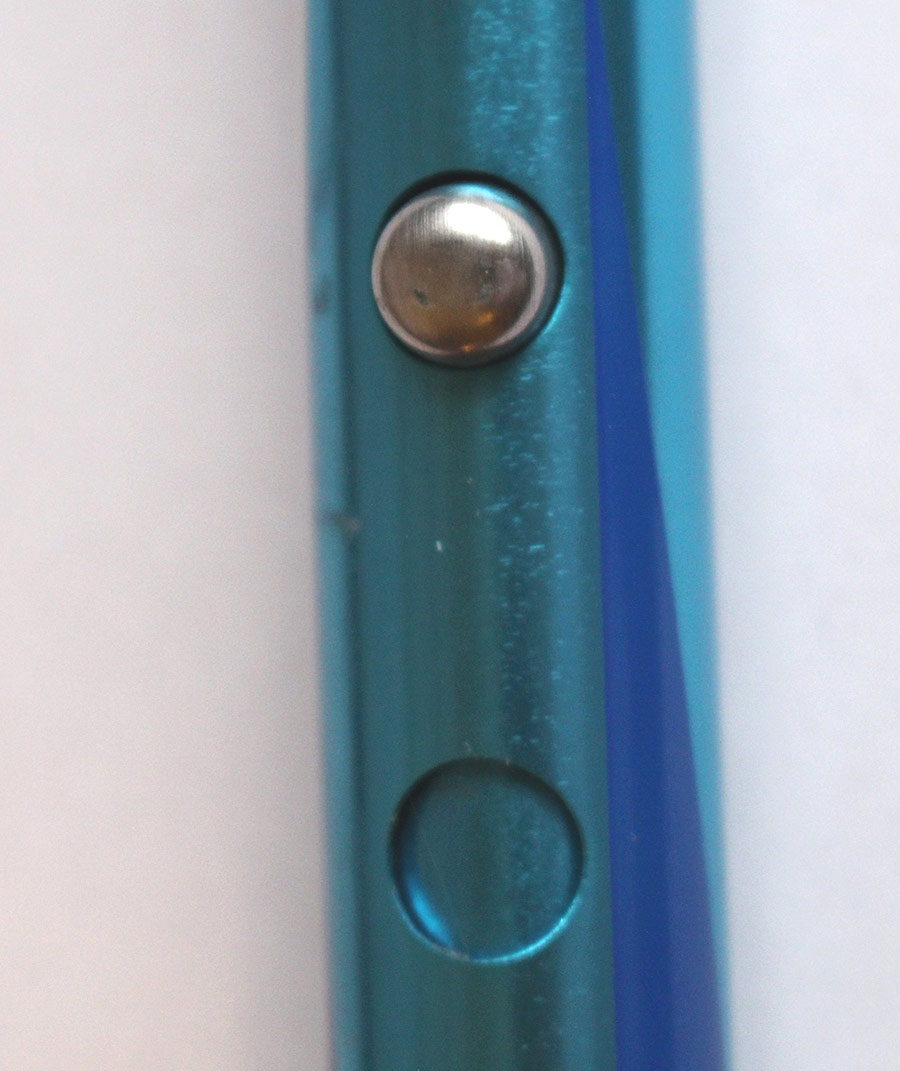
This next step is similar to adjusting a cane with a button lock system. The STABILIZER poles use the same button lock system. Pull out the bottom pole section and turn the pole until you see a silver painted band around the inside section of the pole through the drilled out holes of the outside section. You might have to move the pole in or out slightly to get the silver band to appear. The silver band represents where the button lock is. Once you’ve located the silver band and you have the pole height you want, simply turn the pole and the inside button will click into the outside hole.
STEP 3 – Adjusting your Boot Tip Position
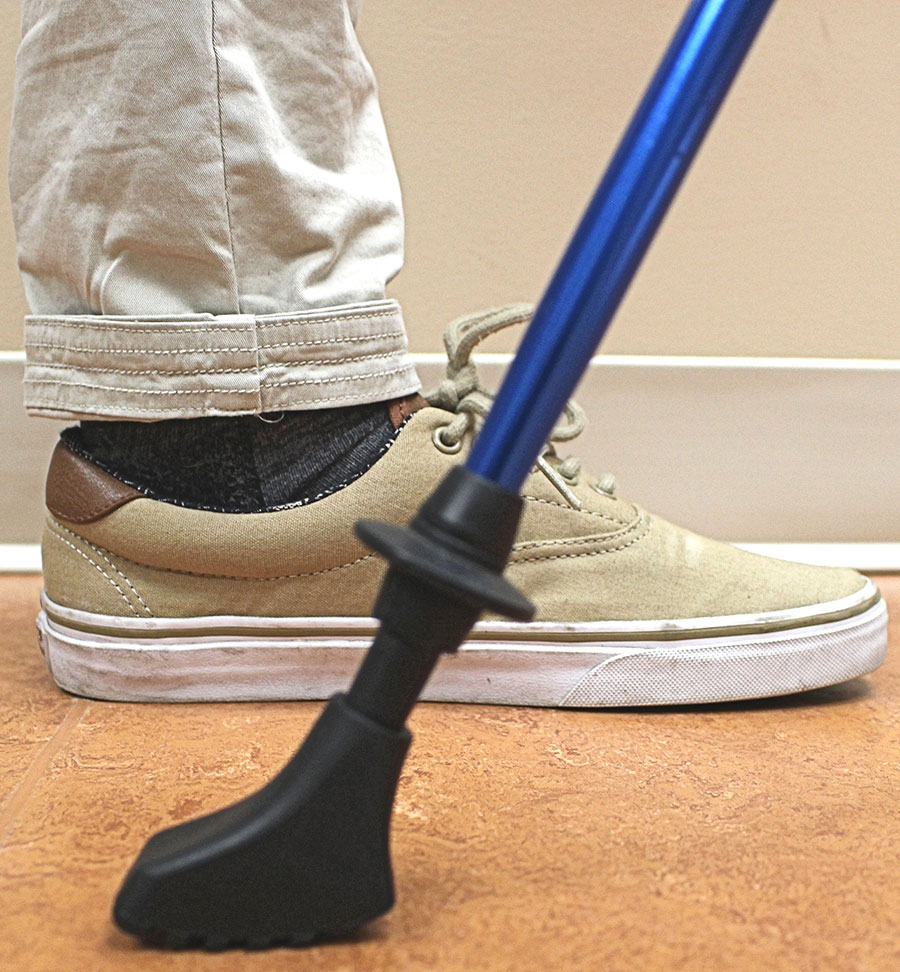
The Rubber Boot Tips is to point backwards while holding the pole in the walking position. The Boot Tip stays on by pressure fit and the adhesiveness of the rubber against the pole.
Simply turn both Boot Tips so they face backwards. This position allows for maximum surface traction.
STEP 4 – Adjustable Wrist Straps on Nordixx WALKER and STABILIZER poles
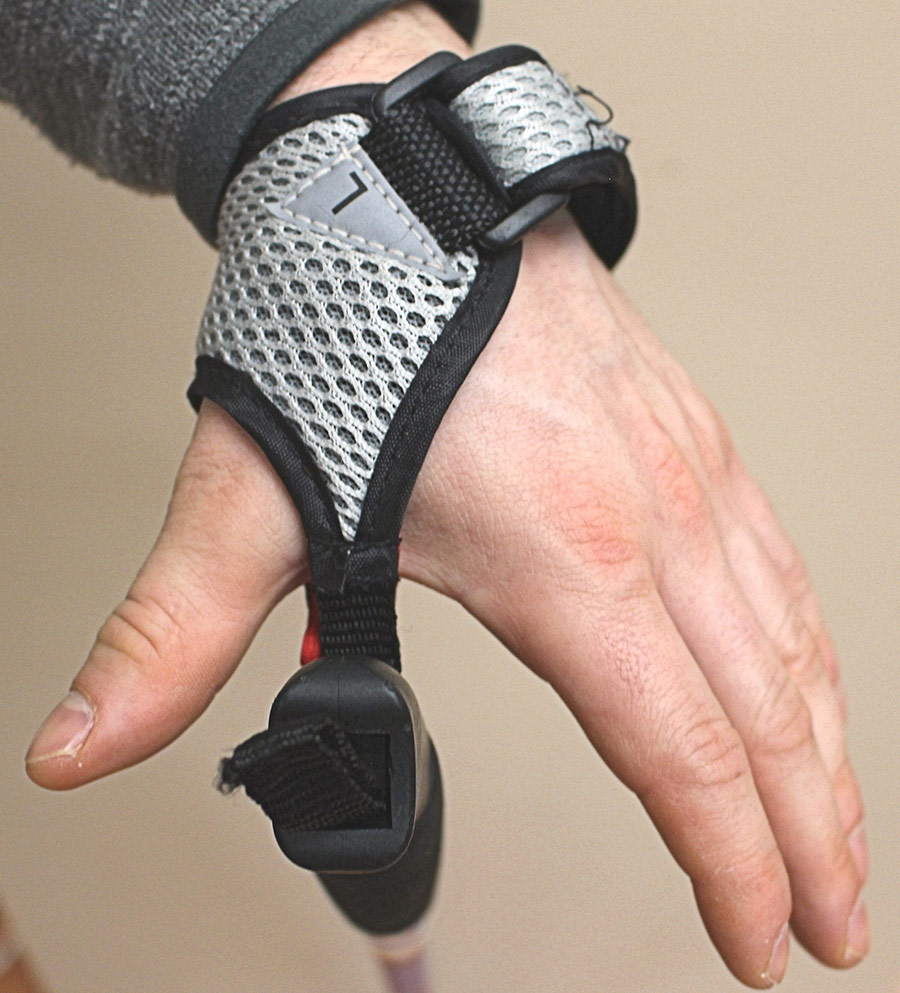
- There is a L (for Left hand) and R (for Right hand) indicated on each Wrist Strap. Hold the Wrist Strap so that it is flat and not twisted.
- Put your hand into the strap with your thumb going into the small thumb hole and your hand going in the big hole.
- Adjust tightness with velcro tab. DO NOT over tighten strap. You should be able to fit your finger in between the strap and the palm of your hand. If you overtighten the strap, you could possibly cause unnecessary hand pain. It should fit like a glove.
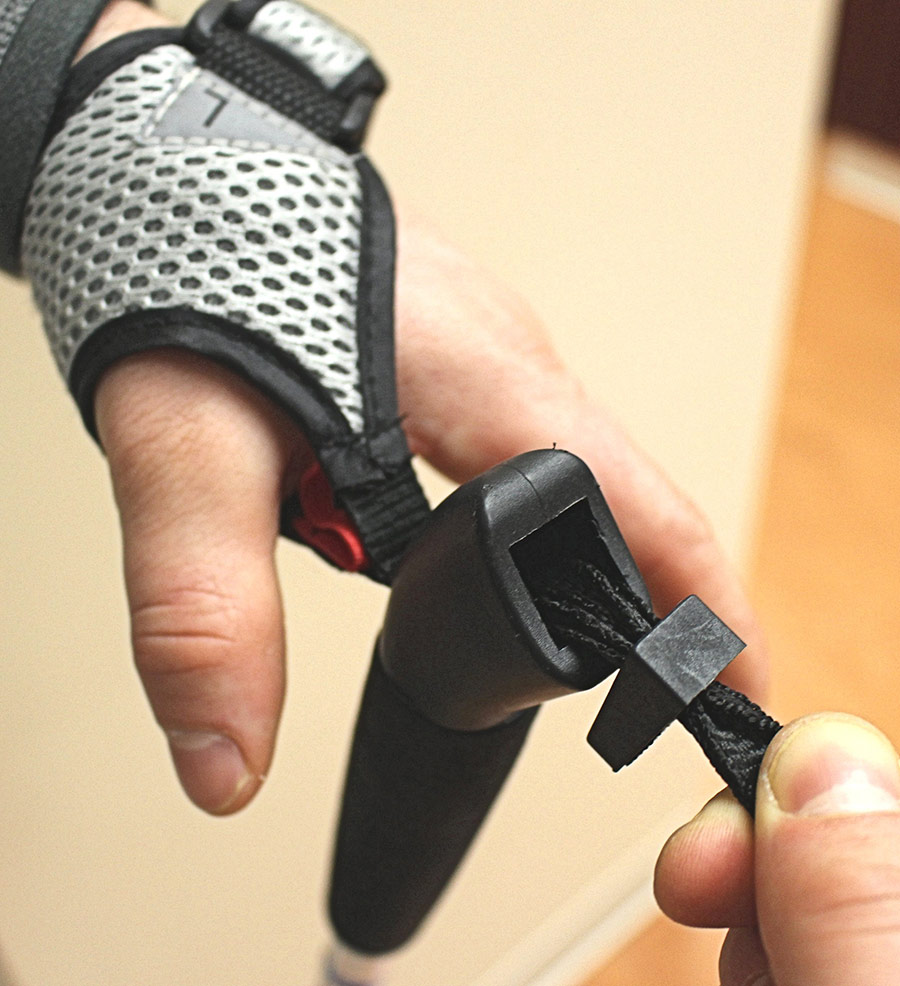
- Once your hand is in your strap and appropriately tightened with velcro, your hand should be approximately a thumb distance away from the pole. If you need to adjust this:
→ Pull up on loop tab on top of pole and a locking triangle wedge will pop out.
→ Pull triangle wedge away from pole to have your hand further away from pole.
→ Push triangle wedge towards pole to have your hand closer to the pole.
→ Push triangle wedge back into top of pole firmly once adjustment has been made.
STEP 5 – Detachable Wrist Straps on Nordixx TRAVELER poles
-
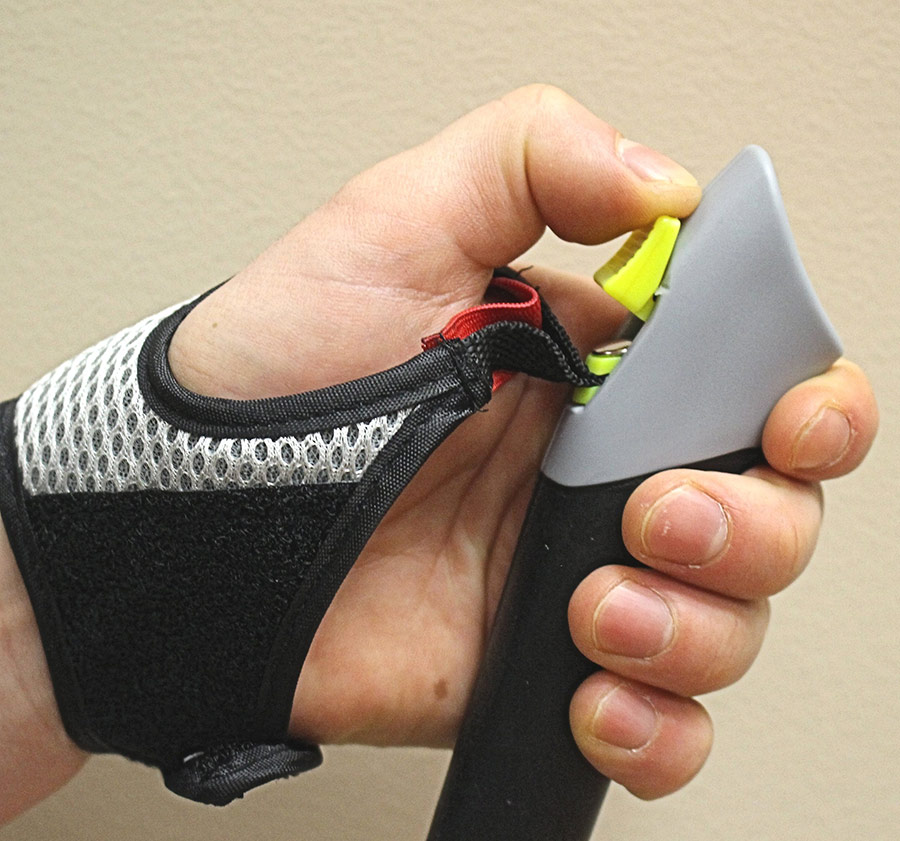
For the Nordixx Global TRAVELER Poles, the Wrist Strap is fixed at a distance approximately a thumb distance away from the pole.
-
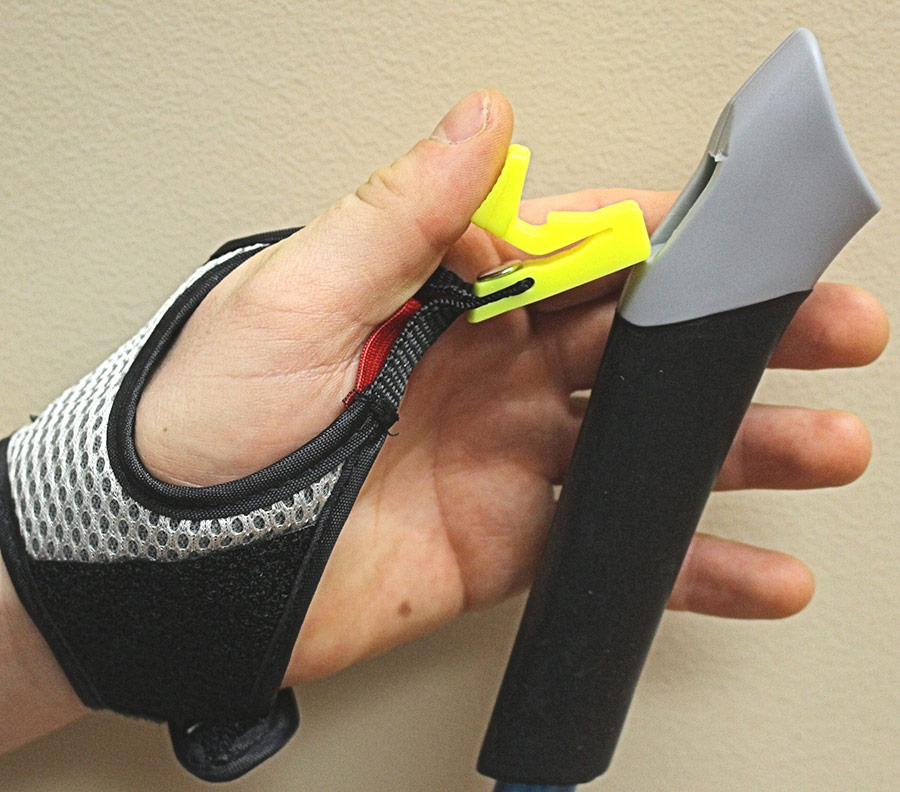
To detach from your pole while your hand is in the strap, firmly push DOWN and OUT on top of yellow locking tab with your thumb and strap will release from the pole.
-
To re-attach to your pole while your hand is in the strap, firmly push yellow locking tab back into the slot in the pole handle until you feel it click in. Make sure the strap is not twisted when re-inserting the yellow tab. Give it a tug down to ensure it is secure before walking with the poles.
STEP 6 – Setting up and using your Snow Baskets on the poles
-
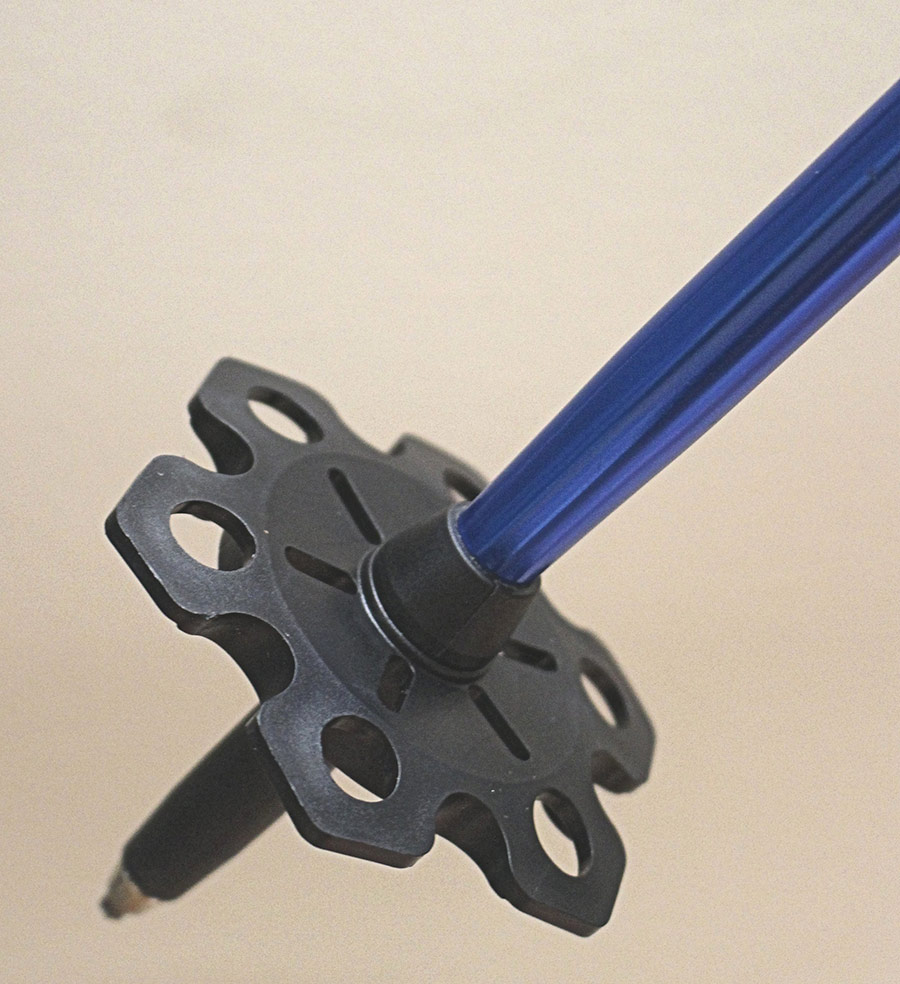
Snow Baskets are used primarily in the winter months to help give you more traction and stability in the snow as well as helps prevent your pole from sinking down into the snow while walking with your poles. It is the same idea as a ski pole. They also help with stability of the pole while walking on a sandy beach in the summer months.
-
Remove Rubber Boot Tips and Dirt Guard Cap on the bottom of the pole and store them somewhere where you will not lose them.
-
Screw on the Snow Basket so that the scoop is pointing down. The Carbide Tip (metal point at the bottom of the pole) is now exposed, this is correct. The Carbide tip will give you grip when you are on ice or sand.
When to use your Rubber Boot Tip or your Carbide Tip
The Rubber Boot Tip used for everyday walking surfaces:
- pavement
- forest
- dry grass
- hard packed gravel
The Carbide Tip (metal tip) used for walking surfaces with less traction:
- sand
- loose gravel
- very wet grass
- ice
Use your discretion as to when you use the Boot Tip or metal Carbide tip, based on the surface you are walking on. In general, you should use the Rubber Boot Tip on most walking surfaces. The Rubber Boot Tips will also give you a little shock absorption while you walk, much like a tire on a car.
